Something I’ve wanted to do for a while but I didn’t realize I already possessed everything I needed to do so. I have installed Towns OS 2.1 (for FM Towns) on an external SCSI hard disk drive. First, and I’ll preface this by saying I didn’t have to and have not yet tried creating partitions, but I’ll at least point you in the right direction until I do it myself. From the settings menu (設定) in image 1, choose partitions (区画設定). Image 2 is the parition manager. You can perform the following actions: delete the partition (click the number) rename a partition or create a new partition (click the name field), choose the file system (click the current file system), choose the boot partition (click the checkbox), and resize the partition (click the current size). Press execute (実行) when you are finished. Press cancel (取消) to back out. Of course, you edit your partitions at your own peril, data loss will occur if you delete or resize a partition. In fact, it might wipe the data off your smart phone and desktop computer just to spite you. 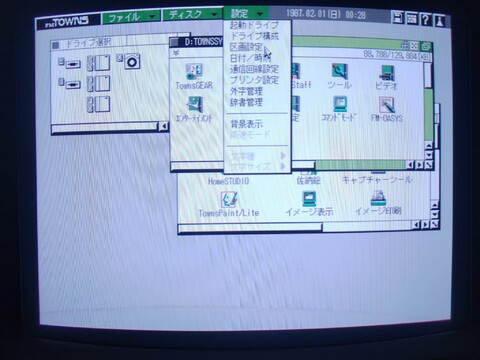 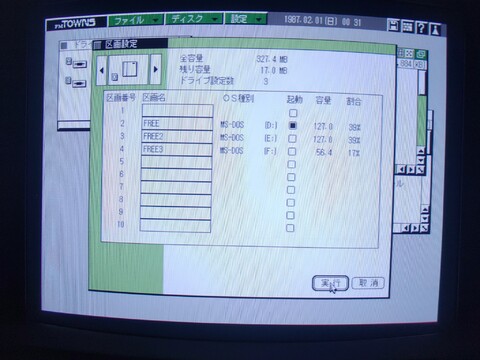 Now for the meaty stuff. My hard drive already had partitions, so what I needed to do was get the OS to see them. This was really like back when I was just learning how to use a PC. I didn’t read the manual and I didn’t use Google, I just looked around from directory to directory until I found things that looked potentially helpful. Found a setup utility and its drive assignment menu, then a tool on the CD that installed the OS onto the drive. 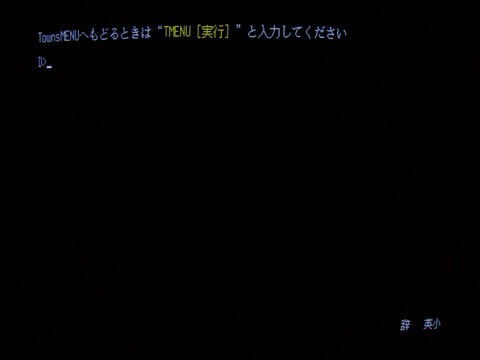 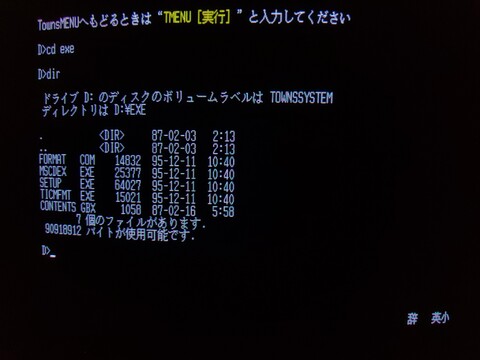 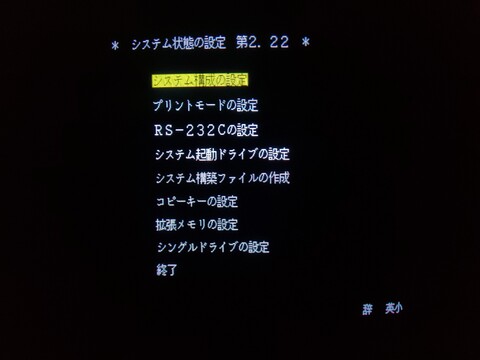 First order of business was dropping to a command prompt and running “setup.exe” from the “exe” directory (you can also do this from the Towns Menu, I later discovered, but perhaps I’ll add that info later). It should take you to the screen in image 3 . The first option in the list is where drive letter assignment is performed. Press enter to see the current configuration. If it is your first time adding a hard drive and you have two floppy drives, it should look like image 4. 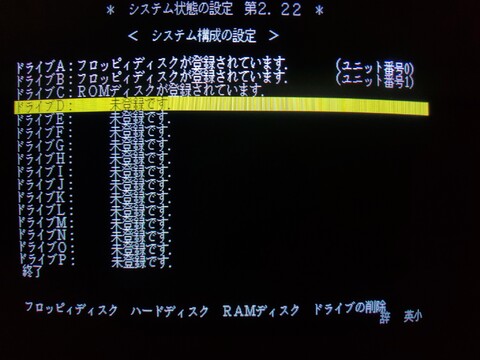 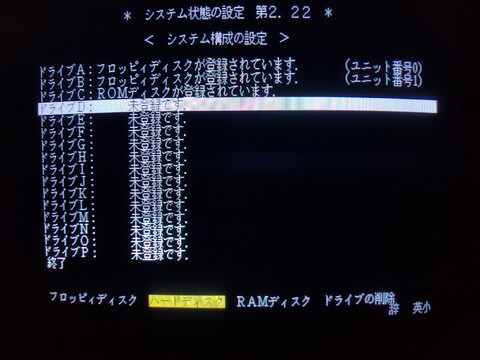 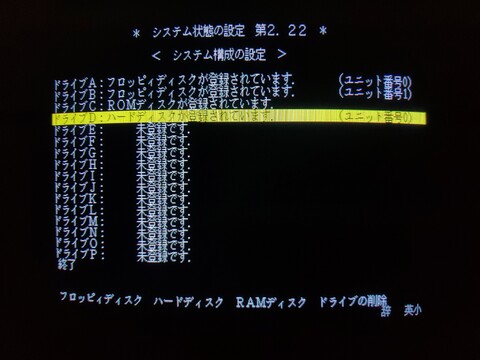 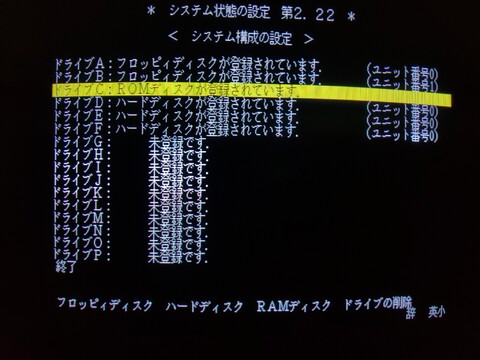 Using the up/down arrow keys, go down to the first available drive, which is probably going to be D if this is your first hard drive. Press enter to activate the action menu, and use the left/right arrow keys to choose the second option – hard disk drive as in image 5. Press enter and it will ask you for a device number 0-4. This may depend on your SCSI settings but I used 0. Press enter and your new drive should be registered in the D row. Repeat this process for every partition you want to access. Mine had three so in image 7, there are now three partitions registered as drives D, E, and F. When you have finished, use the up/down arrow keys to navigate to the bottom option, which is “finish”, as in image 8 and press enter. 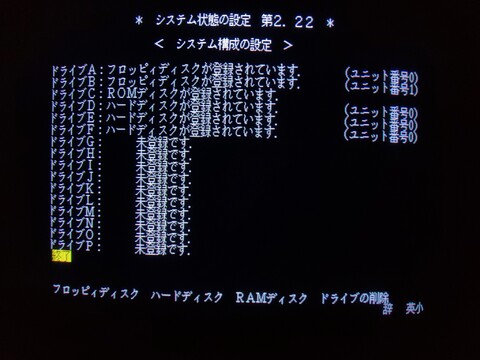 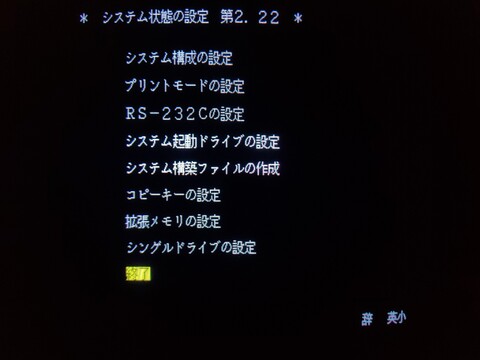 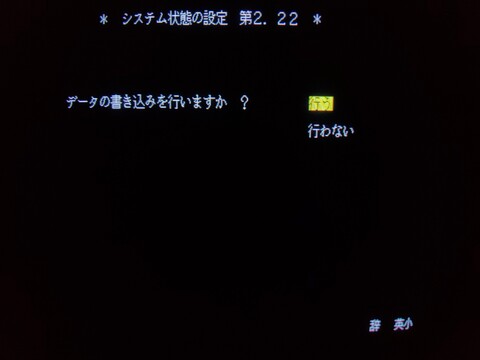  You are now back at the main menu screen. The settings have been prepared but are not yet saved. Use the up/down arrow keys to navigate to the bottom, which is “finish”, as in image 9 and press enter. It will ask you if you want to write the configuration, choose the first option as in image 10, press enter and you will be returned to the command prompt. To get back to the Towns OS menu, first return to the root directory and type “tmenu”, as in the final image. If I recall correctly, you have to reboot for the drives to show up. Going under the assumption that there’s nothing on your hard drive, you’ll need to boot from CD again. If you boot to Towns OS 2.1 L51, click on “tools” (the top-right wrench-like icon in image 1), which will open a window that has a “HD install” icon as seen in image 2. Double-click to start. All of the menus displayed in images 3-8 contain two action buttons: 実行(execute) or 取消 (cancel) (actually, image 3 button two is 終了 (end), but it’s essentially the same in this situation). Feel free to cancel anytime you might want to go back if you’re not confident you’ve made the correct decision. |
| 八 ビ ッ ト hachibitto |